Greetings readers! I know this year has not gotten off to a great start with blogging for me, but I figured that today I had NO excuse NOT to post since I am on Spring Break! Woo hoo!!!! Now if only this Maryland weather could start co-operating...
But for now, Spring-y nails will have to do.
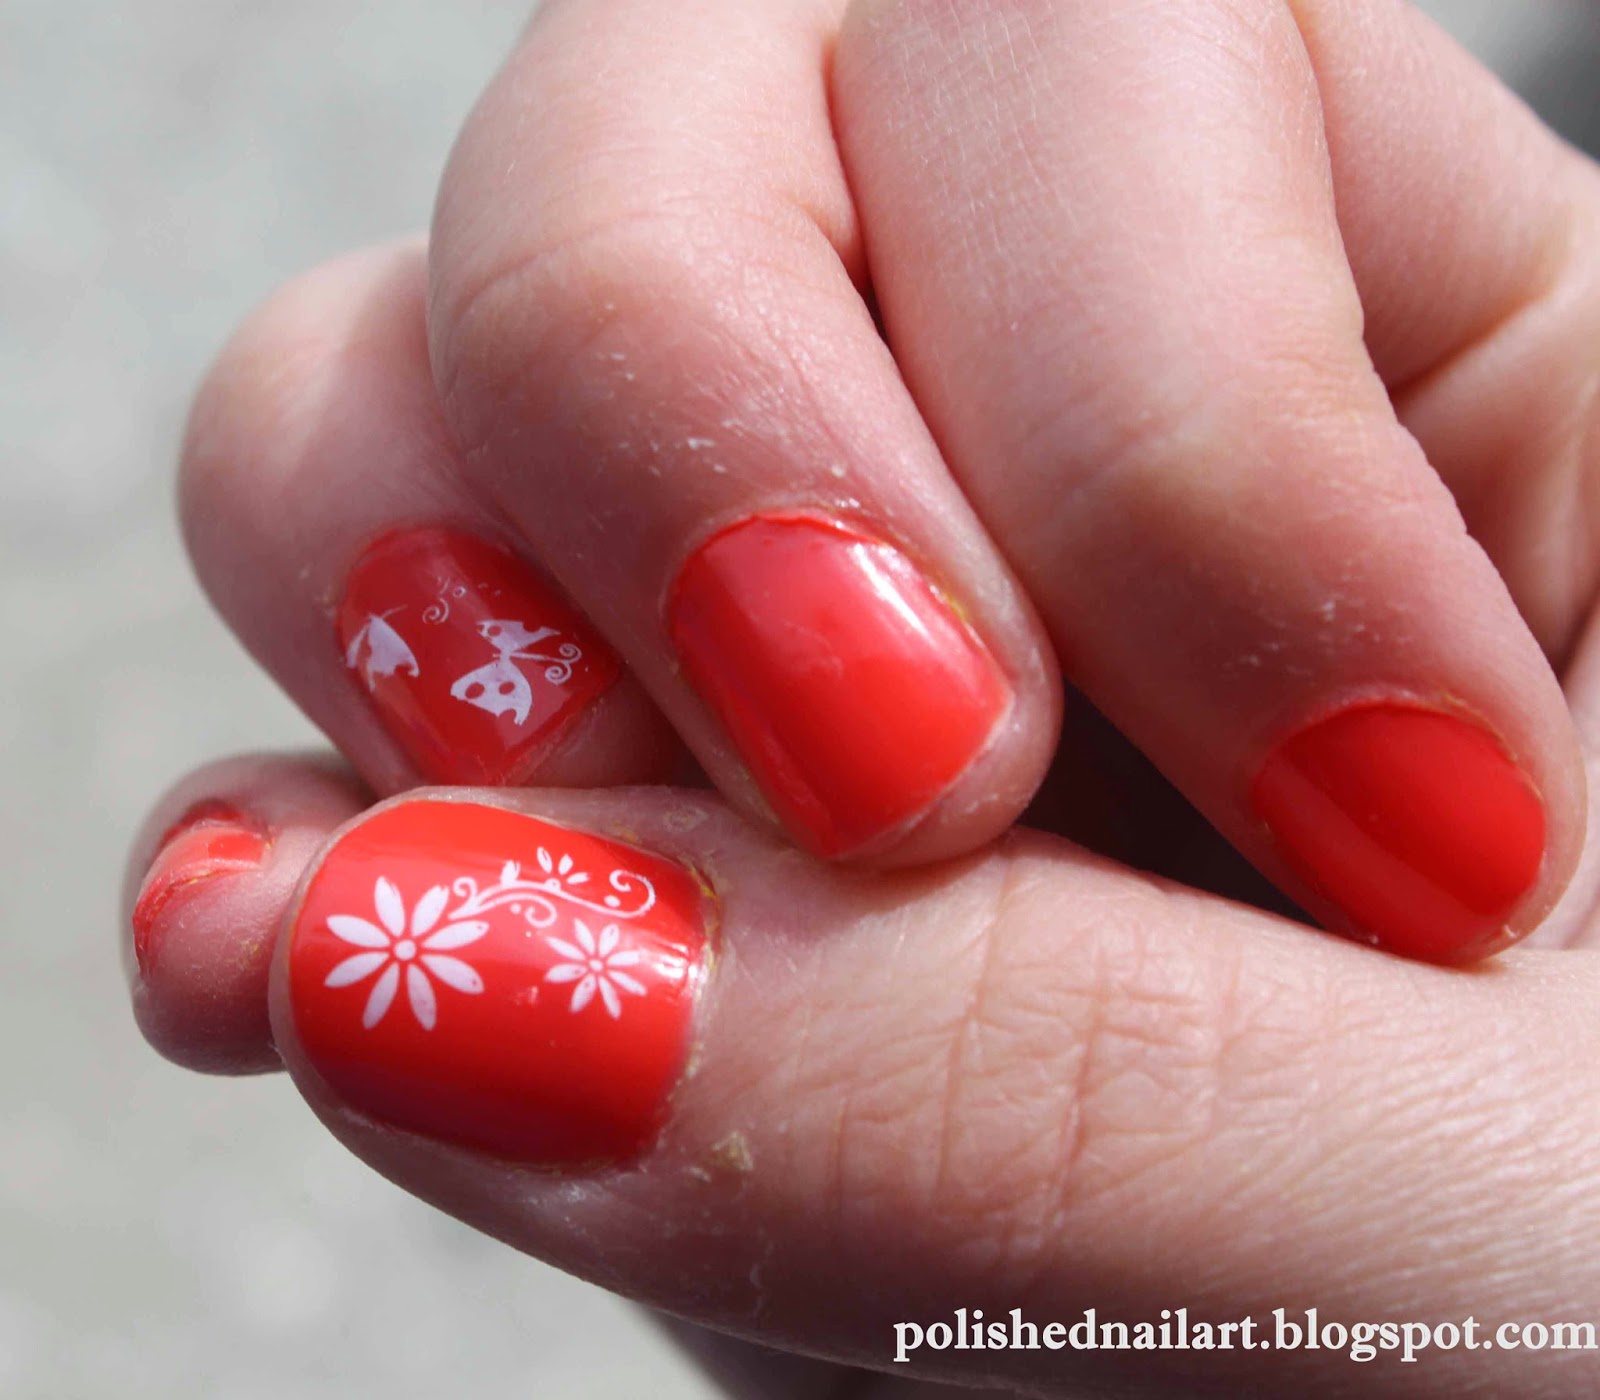
To celebrate the season, I chose a bright orange polish from Ciate that was named Speed Dial. In person I feel the color is a little more peach-like, but with the sunshine, it looks neon.
I felt that flowers were appropriate for spring, so I pulled out my handy little Konad stamping kit and got to work! Stamping is definitely one of my favorite nail art techniques. It's so easy after a bit of practice, and the results are adorable!
This shot shows the butterflies I did on my ring finger and the flowers on my thumb nail.
And just a final shot...
Has it been warming up where you live? And either way, have you started your spring nail art yet?
If you are looking through your polish and need some new colors for spring, take a look at Julep's spring nail collection here: http://www.julep.com/shop/nail-polish/spring-colors.html. The colors are absolutely gorgeous and perfect for this time of year!
Enjoy, and as always, feel free to leave any comments or suggestions below!
Happy Spring!!!
:) Trendy T
Showing posts with label Konad. Show all posts
Friday, April 18, 2014
Tuesday, June 18, 2013
Minty Funky French Manciure
Good evening, my nail friends :) Two posts in two weeks... Not bad :)
Today I'm sharing with you a design I created a couple days ago using my wonderful Konad Stamping Kit. Take a look:
The mani looks really cute, but it was pretty simple to create with my handy dandy stamps!!! I also love the color combo... The minty green (Gargantuan Green Grape by OPI) goes very nicely with the white and clean black lines.
After painting several coats of the green base, I stamped on these white French tips. The nice thing about a manicure like this is that you could even stop here and have a gorgeous French manicure.
This is a picture of my nails and the Konad plate I used, m 19. This plate is wonderful, and lets anyone create a French design on fingers (or toes) or any size. It's a little challenging at first to make sure and line up everything correctly and not create a slanted tip, but with practice, you can achieve beautiful results!!
After that, I used m 45 to add on the funky black design. This plate has six cute designs to layer on top of any French manicure. And this is done the same way as the plain French tip above. Just make sure to line up this design with the white tip already on your nails.
And Voila!!!! Here we now have a gorgeous manicure that looks like it came straight from a salon!!!
If you'd like to see a more in-depth tutorial about stamping, check out an older post by me here.
Thanks for reading, and be sure to leave any comments and advice below!! :) Happy Summer!!!
✾ Trendy T ✾
Today I'm sharing with you a design I created a couple days ago using my wonderful Konad Stamping Kit. Take a look:
The mani looks really cute, but it was pretty simple to create with my handy dandy stamps!!! I also love the color combo... The minty green (Gargantuan Green Grape by OPI) goes very nicely with the white and clean black lines.
After painting several coats of the green base, I stamped on these white French tips. The nice thing about a manicure like this is that you could even stop here and have a gorgeous French manicure.
This is a picture of my nails and the Konad plate I used, m 19. This plate is wonderful, and lets anyone create a French design on fingers (or toes) or any size. It's a little challenging at first to make sure and line up everything correctly and not create a slanted tip, but with practice, you can achieve beautiful results!!
After that, I used m 45 to add on the funky black design. This plate has six cute designs to layer on top of any French manicure. And this is done the same way as the plain French tip above. Just make sure to line up this design with the white tip already on your nails.
And Voila!!!! Here we now have a gorgeous manicure that looks like it came straight from a salon!!!
If you'd like to see a more in-depth tutorial about stamping, check out an older post by me here.
Thanks for reading, and be sure to leave any comments and advice below!! :) Happy Summer!!!
✾ Trendy T ✾
Sunday, August 26, 2012
Orange Konad Nails
Here is a finished look at a manicure I did using my Konad stamping kit. I chose a butterfly and flower design for my thumbs and ring fingers.
After a base coat, I applied Wet n Wild Wild Shine polish in Blazed. In the above photo, I had to apply two coats so that the polish wouldn't be so opaque.
Here are the basic supplies you would need to do a stamping manicure. All of my items as mentioned are from Konad. From left to right, top to bottom: paint scraper, stamper, and two design plates. The plates I used are m53 (butterfly) and m25 (flower).
First, you will need to apply a covering of paint to whichever design you choose. The special Konad paints are best for this because many other polishes are too opaque to stamp; the Konad ones are more pigmented than others.
Next, you will use your scraper to remove all of the excess polish. You should just be left with you design covered in paint, just like the picture above.
Take your stamper to pick up the design. Tip: try to stamp up the design as quickly as possible since the thin layer of polish dries fairly quickly; don't worry though, your timing will improve with practice.
After picking up the design, your stamper should look something like this. If you see other spots or streaks of color that are not part of your design, clean the stamper and plates with polish remover and try again.
Now simply stamp the design onto your nail. The best method I have found is to start at the edge of your nail, and firmly roll the stamp over the center of the nail.
And these are my finished nails! I did apply top coat, however, with stamped designs, it is best to quickly and gently apply a thin top coat. Going over and over the design too many times will actually create streaks on it.
Happy stamping!
xoxo Trendy Tips xoxo
After a base coat, I applied Wet n Wild Wild Shine polish in Blazed. In the above photo, I had to apply two coats so that the polish wouldn't be so opaque.
Here are the basic supplies you would need to do a stamping manicure. All of my items as mentioned are from Konad. From left to right, top to bottom: paint scraper, stamper, and two design plates. The plates I used are m53 (butterfly) and m25 (flower).
First, you will need to apply a covering of paint to whichever design you choose. The special Konad paints are best for this because many other polishes are too opaque to stamp; the Konad ones are more pigmented than others.
Next, you will use your scraper to remove all of the excess polish. You should just be left with you design covered in paint, just like the picture above.
Take your stamper to pick up the design. Tip: try to stamp up the design as quickly as possible since the thin layer of polish dries fairly quickly; don't worry though, your timing will improve with practice.
After picking up the design, your stamper should look something like this. If you see other spots or streaks of color that are not part of your design, clean the stamper and plates with polish remover and try again.
Now simply stamp the design onto your nail. The best method I have found is to start at the edge of your nail, and firmly roll the stamp over the center of the nail.
And these are my finished nails! I did apply top coat, however, with stamped designs, it is best to quickly and gently apply a thin top coat. Going over and over the design too many times will actually create streaks on it.
Happy stamping!
xoxo Trendy Tips xoxo
Subscribe to:
Posts (Atom)