Wednesday, June 4, 2014

Purple Passion

Greetings readers!!!! It's finally summer and school is out of session. So to celebrate I created a fun purple mani. Take a look!          I used a Demi Lovato "The New Black" kit for both polishes. 
I love the metallic purple matte polish. It's got a little sparkle while still not being super shiny.

I am also completely in love with the metallic foil. Just two simple coats covered the purple polish in gorgeous sparkly bits.

Hope your summers are starting out well!!! I'm loving the sunny weather!!

;) trendy t 

Friday, April 18, 2014

Spring Stamping

Greetings readers! I know this year has not gotten off to a great start with blogging for me, but I figured that today I had NO excuse NOT to post since I am on Spring Break! Woo hoo!!!! Now if only this Maryland weather could start co-operating...

But for now, Spring-y nails will have to do.
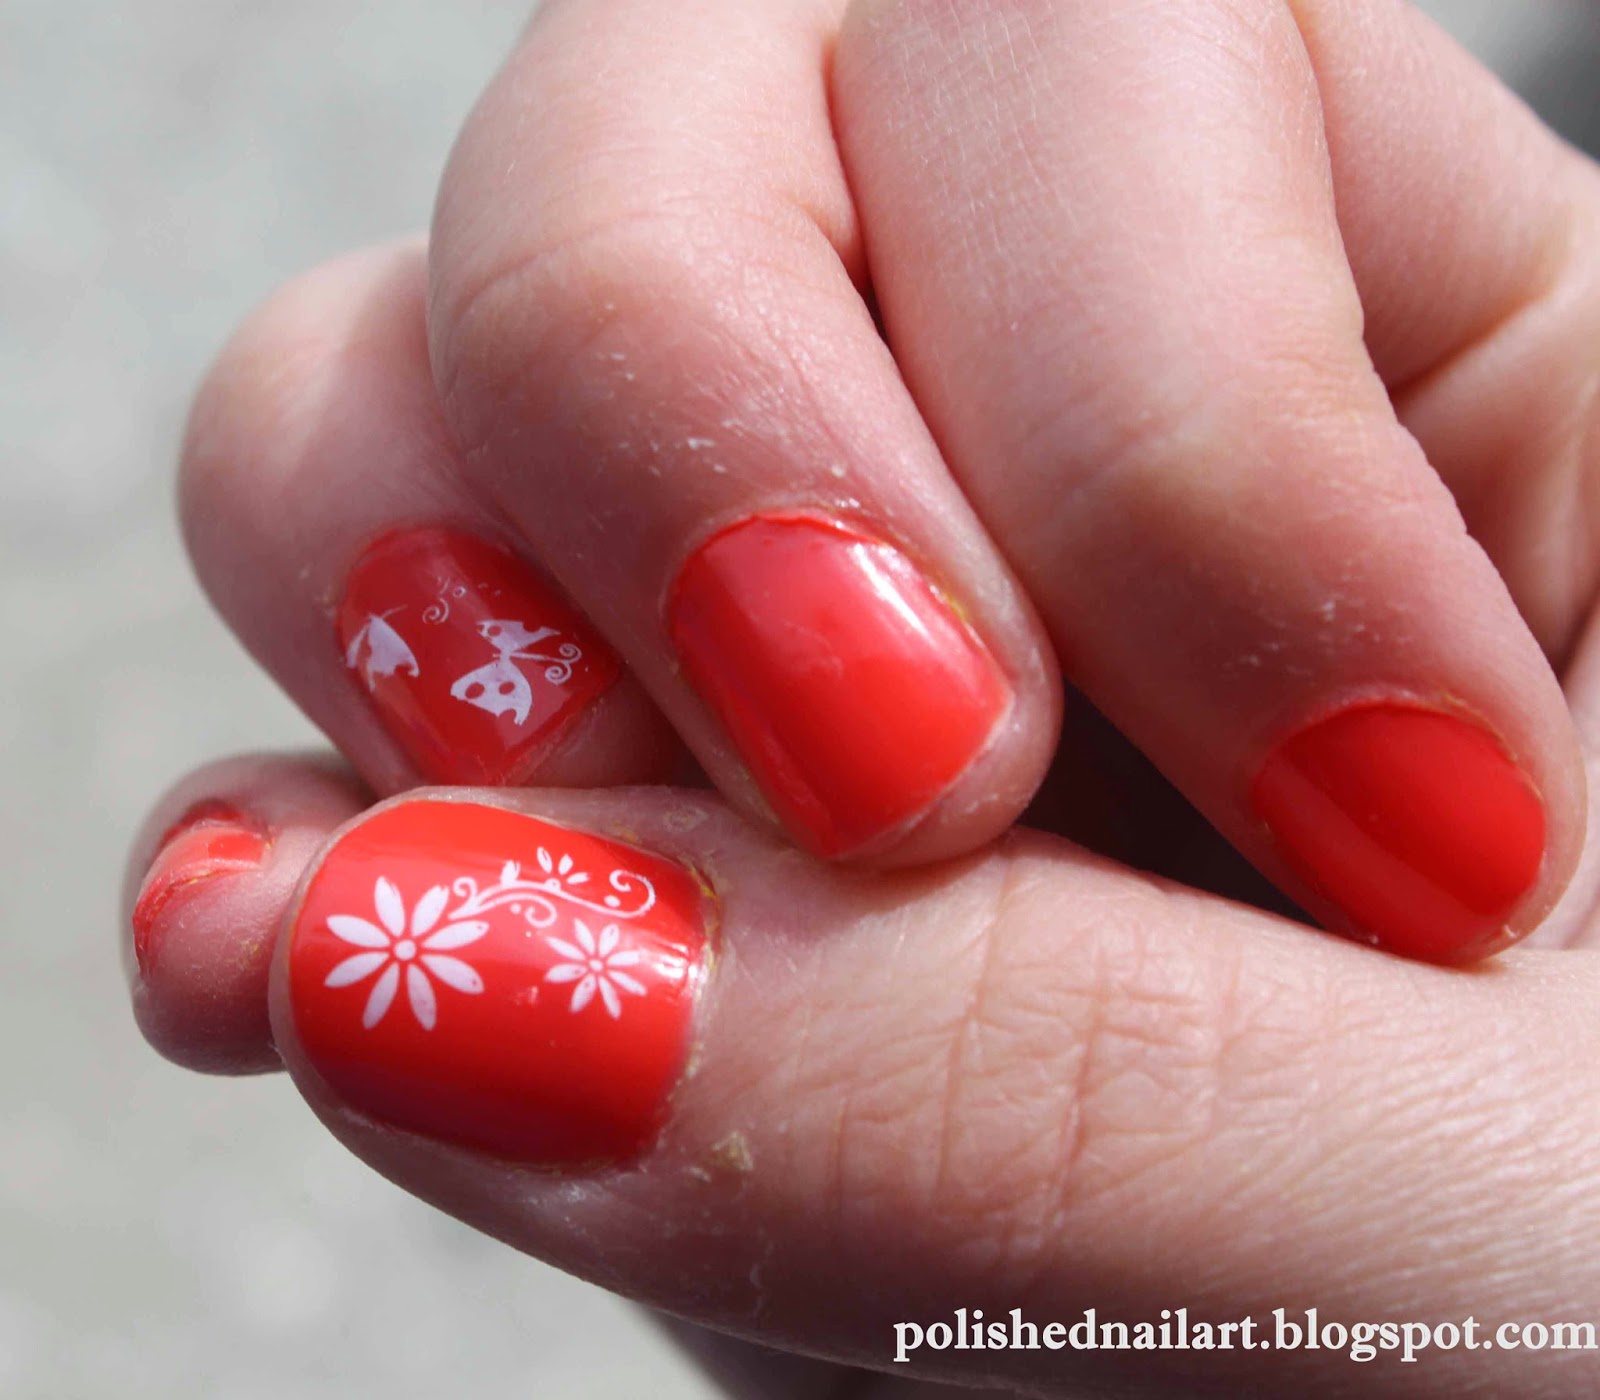
 To celebrate the season, I chose a bright orange polish from Ciate that was named Speed Dial. In person I feel the color is a little more peach-like, but with the sunshine, it looks neon.
 I felt that flowers were appropriate for spring, so I pulled out my handy little Konad stamping kit and got to work! Stamping is definitely one of my favorite nail art techniques. It's so easy after a bit of practice, and the results are adorable!
 This shot shows the butterflies I did on my ring finger and the flowers on my thumb nail.

And just a final shot...

Has it been warming up where you live? And either way, have you started your spring nail art yet?

If you are looking through your polish and need some new colors for spring, take a look at Julep's spring nail collection here: http://www.julep.com/shop/nail-polish/spring-colors.html. The colors are absolutely gorgeous and perfect for this time of year!

Enjoy, and as always, feel free to leave any comments or suggestions below!

Happy Spring!!!
:) Trendy T

Sunday, January 5, 2014

Happy New Year!!!

Hello all!! Happy 2014!!! I suppose my resolution should be to post more often... I certainly have missed blogging but it has been a crazy year!! Anyway, here are a few photos of my New Year's mani!

My first and ring finger here are painted in Headliner by Ciate. However, on my ring finger I also have some caviar pearls. I couldn't get a clear close-up, but I love the textured 3D look of caviar!!! And it's so easy to do to... The pink is Ciate Cupcake Queen.
 And here's a shot I took that includes my thumb nail. I love the colorful red, pink, gold, and orange glitter!!!!! So pretty :) And again, it was really easy to use.
This picture shows you the caviar pearls a little bit more zoomed in. Hope you enjoyed it, and I'll try to be back with a new post soon!!!

<3 p="" t="" trendy="">

Wednesday, July 3, 2013

Nice 'n Natural

Happy Hump Day everyone!!! :) It's once again cloudy and rainy here in Maryland- the perfect weather for nail posting!!! LOL.

Over the weekend, I went to Rehoboth Beach, and chose to have a more natural nail while I was away. I ended up liking the color so much, I added some nail art. So take a look!!

 My first thought was to attempt a dotticure, which you can see on my ring finger. However, after that didn't turn out quite as hoped, I went for the simpler, "abstract" look. :)
 I love these two polishes together though!!! And it's hard to see, but the darker, accent color is actually very pretty, sparkly, and multi-toned.
That's all for today!!! I hope you all are enjoying your summers!!!!

Polishes Used: Ciate Cookies and Cream; Twilight.

:) Trendy T :)

Saturday, June 22, 2013

#1 Orioles Fan

Greetings everyone!!!! For the manicure I have to share today, I changed things up a little bit and created a "Skittles" design for you all.

With the summer getting under way, Major League Baseball is in full swing, and my Baltimore Orioles are doing great!  (If you don't already know, I'm obsessed.with them  :). My outfit for the day consisted of jean shorts, an orange cami with white dots, an Orioles v-neck, baseball cap earrings, and a string bracelet in the O's colors. So I of course had to create some nails to match!!! :)

 My idea for this mani was simply to use several different techniques in the Orioles' colors of orange, white, and black. I also wanted a good excuse to break out my black crackle polish. ;)
 This pic shows the water marble that I created on my thumb. I think it turned out pretty well, and only took a couple of minutes!!!! But the results of water marbling are always so neat. :)
 Here's a close-up and front view of my thumb design. For the colors, I used an orange by Ciate, black from Wet n Wild, and Sally Hansen white. All three worked great for the water marbling!!!!
 On my first finger, I made a 3D type of design by dragging slightly dried polish over the orange background. Obviously my middle finger has my black Pure Ice crackle polish that I love so much :). I tried to ombre my ring finger, and it didn't turn out the best, but I think you still get the ombre feel. And then my pinky... Hmmm, not sure what to say other than I ran out of time and ideas and just painted it white. What a cop-out... LOL :)
And another side view, just because I'm sure NONE of you are getting at all tired of my sports obsession ;). Oh well, at least the Orioles are doing well so you don't have to hear me complaining all summer...

Who's your favorite baseball team? And do you like to create sports manicures???

Come back soon, and feel free to leave your thoughts below!!

 Ƹ̴Ӂ̴Ʒ Trendy T  Ƹ̴Ӂ̴Ʒ

Tuesday, June 18, 2013

Minty Funky French Manciure

Good evening, my nail friends :) Two posts in two weeks... Not bad :)

Today I'm sharing with you a design I created a couple days ago using my wonderful Konad Stamping Kit. Take a look:

 The mani looks really cute, but it was pretty simple to create with my handy dandy stamps!!! I also love the color combo... The minty green (Gargantuan Green Grape by OPI) goes very nicely with the white and clean black lines.
 After painting several coats of the green base, I stamped on these white French tips. The nice thing about a manicure like this is that you could even stop here and have a gorgeous French manicure.
 This is a picture of my nails and the Konad plate I used, m 19. This plate is wonderful, and lets anyone create a French design on fingers (or toes) or any size. It's a little challenging at first to make sure and line up everything correctly and not create a slanted tip, but with practice, you can achieve beautiful results!!
 After that, I used m 45 to add on the funky black design. This plate has six cute designs to layer on top of any French manicure. And this is done the same way as the plain French tip above. Just make sure to line up this design with the white tip already on your nails.
And Voila!!!! Here we now have a gorgeous manicure that looks like it came straight from a salon!!!

If you'd like to see a more in-depth tutorial about stamping, check out an older post by me here.

Thanks for reading, and be sure to leave any comments and advice below!! :) Happy Summer!!!

✾ Trendy T ✾

Saturday, June 8, 2013

Neon Splash Abstract Design

WOOHOO!!! Summer is here and School is OUT!!!!! (And I haven't posted in 3 months...) Wonderful... But I promise to make it up to you with lots of posts this summer :)

So today's post is inspired by one of the first designs I did, found here. I loved that toe design so much, I decided to change it up for a manicure.

 I love the look of these three polishes together, and it's a perfect mani for summer!!! Unfortunately, the weather here in Maryland is overcast, so the photos don't even quite capture the brilliance of the sparkly pink background.
 This design is so cute, and so simple to emulate!!!! Really, all I did was use some nail art polishes (the green and blue) to add some stripey lines. It took not even fifteen minutes, but turns out really well.

I really loved the way my thumb turned out, and you can somewhat see it blurred above...
 This shows a head-on view of most of the nails. As you can see, there's no real pattern, but that's what makes it unique and one-of-a-kind. :)
 Now this is how my other hand turned out. It's not as great (still learning how to paint with my right hand better :), but still came out nicely. This is one manicure that is really great to practice using your non-dominant hand with. It's very forgiving, and since there's no uniform pattern, you "can't mess up"!!! How great is that?
And here's a final parting shot of my left hand. I tried to get more creative with my poses... What do you think?

Thanks for reading, and feel free to leave thoughts and ideas below in the comments!! :)

Polishes Used:

  • Color Fever Petites: Raspberry Ice (this was a couple dollars at the local pharmacy, but is such a gorgeous color!!!)
  • Sinful Colors Nail Art: Sour Apple and Hey Dear! (these brushes are wonderful for freehand designs)
:) Trendy T :)